
Try Kadalu Storage!
4 minutes read.
Kadalu Storage is an opinionated distributed Storage solution based on GlusterFS. Kadalu Storage uses the file system layer from GlusterFS and built a completely new ecosystem around it.
In this blog post, We will discuss Kadalu Storage and try it out using containers. Native packages for Ubuntu/Fedora/CentOS distributions are coming soon.
One Storage container per VM/node (Production setup)
If you have a few spare VMs or machines, then you can easily set up Kadalu Storage and check if it fits your needs. Kadalu Storage team has created ready to use containers that can be started to behave as Storage nodes.
sudo docker run -d                            \
    --network host                            \
    -v /root/kadalu/workdir:/var/lib/kadalu   \
    -v /root/kadalu/config:/root/.kadalu      \
    -v /ZP1/storage1:/ZP/storage1             \
    -v /sys/fs/cgroup/:/sys/fs/cgroup:ro      \
    --privileged                              \
    --name kadalu-$(hostname)                 \
    --hostname $(hostname)                    \
    kadalu/storage-node:latest
In the above example, the following Storage is exposed to the Storage container as a Volume.
-v /ZP1/storage1:/ZP/storage1
Pre-create the file system(xfs/ext4/zfs) and expose the Storage while starting the Kadalu Storage container. Provide multiple Storage units per container/node as required. For example, the following code shows creating ZFS dataset and exposing that while starting the Storage node.
sudo zpool create ZP1 /dev/vda
sudo zfs create ZP1/storage1
Along with Storage units a few other directories have to be persisted.
-
/var/lib/kadalu- If a Container becomes Mgr instance then it stores full cluster configurations, else if it is Agent instance, it will contain the tokens that are required to communicate with Mgr instances. -
/root/.kadalu- This is optional, but good to have this persisted to avoid running login command every time on container restart.
With network=host option, starting multiple Storage containers per node is not possible with this option. Instead, expose multiple Storage units per instance of Storage container.
A utility script, provided in the project repo, that helps to spawn the Storage containers. For example, the following code shows starting three Storage containers.
server1 $ python3 start_storage_node_container.py -w /root/kadalu /ZP1/storage /ZP2/storage
server2 $ python3 start_storage_node_container.py -w /root/kadalu /ZP3/storage /ZP4/storage
server3 $ python3 start_storage_node_container.py -w /root/kadalu /ZP5/storage /ZP6/storage
client1 $ python3 start_storage_node_container.py -w /root/kadalu
Multiple Storage containers per VM/node (Development Setup)
If you want to experience the multi node Kadalu Storage using single VM/node, create a network and use the same while creating a Kadalu Storage container.
sudo docker network create k1

sudo docker run -d                            \
    --network k1                              \
    -v /root/kadalu/workdir1:/var/lib/kadalu  \
    -v /root/kadalu/config1:/root/.kadalu     \
    -v /exports/s1:/exports/s1                \
    -v /sys/fs/cgroup/:/sys/fs/cgroup:ro      \
    --privileged                              \
    --name kadalu-server1                     \
    --hostname server1                        \
    kadalu/storage-node:latest
Note the change in --network option compared to the previous method. Use the utility script to automatically create the network and start multiple Storage/client containers in single node/VM.
testvm $ mkdir -p /exports/s1 /exports/s2 /exports/s3
testvm $ python3 start_storage_node_container.py -w /root/kadalu1 /exports/s1 --network k1 --hostname server1
testvm $ python3 start_storage_node_container.py -w /root/kadalu2 /exports/s2 --network k1 --hostname server2
testvm $ python3 start_storage_node_container.py -w /root/kadalu3 /exports/s3 --network k1 --hostname server3
testvm $ python3 start_storage_node_container.py -w /root/kadalu4 --network k1 --hostname client
Once all the required containers (Storage nodes) are running, then create a Pool and the Volume.
$ sudo docker exec -it kadalu-server1 /bin/bash
# kadalu user create admin
Password:
User admin created successfully. Run `kadalu user login admin` to login
# kadalu user login admin
Password:
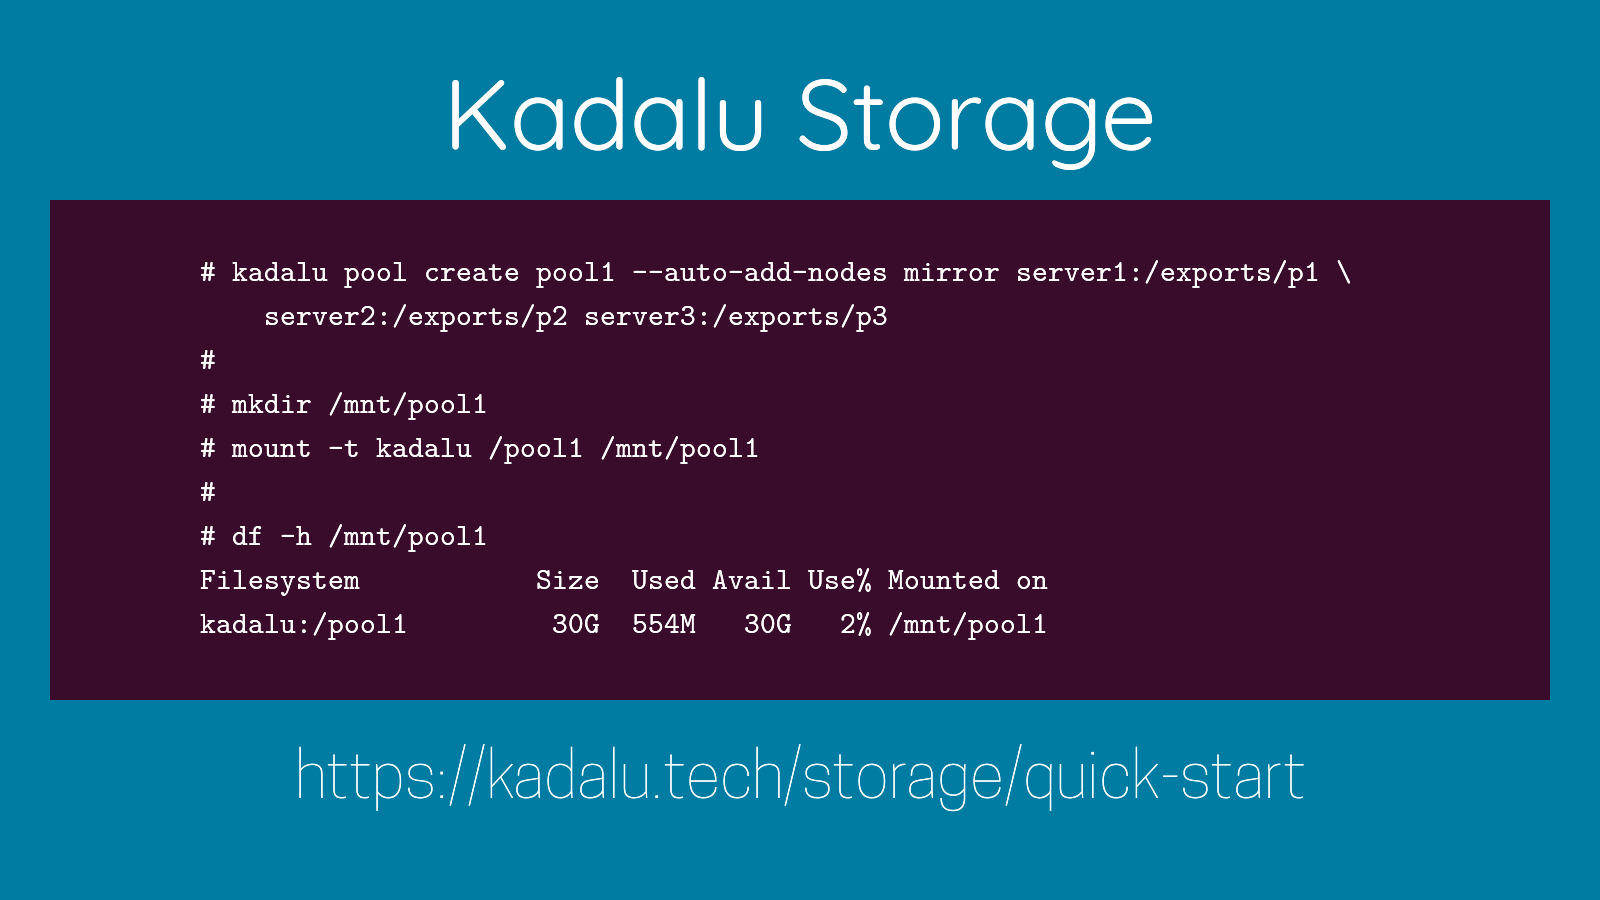
Login successful. Details saved in `/root/.kadalu/session`. Delete this file or run `kadalu user logout` command to delete the session.Create a Kadalu Volume using the Storage exported from the host.
server1 # kadalu volume create DEV/vol1 --auto-create-pool --auto-add-nodes \
    mirror server1:/ZP1/storage/vol1                                        \
           server2:/ZP3/storage/vol1                                        \
           server3:/ZP5/storage/vol1
Mount the Volume by logging into one of the Storage container or the Client container.
$ sudo docker exec -it kadalu-client1 /bin/bash
# kadalu login admin
Password:
# mkdir /mnt/vol1
# mount -t kadalu server1:/DEV/vol1 /mnt/vol1
Workdir and Storage are persisted even after Container restart. Stop the containers, and delete those directories if complete cleanup is required.
Kadalu Storage is still under development, Please provide your valuable feedback (https://github.com/kadalu/moana/issues) to make Kadalu Storage production ready for you!